There’s a common assumption that small computers mean small performance. It’s a fair thought—these compact boxes look more like external hard drives than powerful workstations. But the reality is often the opposite. A Mini PC can handle serious workloads, but sometimes it just needs a little push to get there. That push usually comes in the form of a Mini PC RAM upgrade.
It’s one of those things that seems intimidating at first. The components are smaller, the cases are tighter, and there’s always that voice in the back of the mind saying, “What if I break something?” Having looked at dozens of these units over time, the process is actually more forgiving than it appears. It just requires a bit of patience and knowing what to look for before opening the case.
Why Consider a Mini PC RAM Upgrade
Out of the box, many Mini PCs come with just enough memory to run the operating system. For basic browsing or streaming, that’s fine. But the moment you start multitasking—keeping a dozen browser tabs open while running a spreadsheet or a lightweight design tool—the system starts to stutter.
Upgrading the memory isn’t about turning a budget machine into a gaming rig. It’s about smoothing out the daily experience. The difference between 4GB and 16GB in these compact systems is night and day. Applications launch faster, file transfers feel snappier, and the system doesn’t spend half its time swapping data to the storage drive. From a purely observational standpoint, it’s the single most effective upgrade you can do for a Mini PC that’s started to feel sluggish.
Understanding the Limitations
Before buying anything, it’s worth checking what’s actually inside. Mini PCs don’t use the same RAM sticks as full-sized desktops. They rely on SODIMM (Small Outline Dual In-line Memory Module) form factors—the same type found in laptops.
There’s also the soldered question. Some ultra-compact models, particularly the thinner ones, have memory soldered directly onto the motherboard. If that’s the case, a traditional upgrade isn’t possible. That’s a detail often overlooked in the excitement of shopping for parts, but it’s a critical one.
Step-by-Step Mini PC RAM Upgrade Process
If the system does have accessible SODIMM slots, the upgrade is surprisingly straightforward. The process takes maybe ten minutes, though the first time always feels longer just because of the caution involved.
Preparation and Compatibility Check
The first step is figuring out what the machine can handle. This isn’t the time for guesswork. Checking the manufacturer’s spec sheet is the safest route, but there’s another method that works well: looking at the existing stick if the PC is already open.
Here’s a quick checklist to run through:
Form Factor: Must be SODIMM (260-pin for DDR4 or 262-pin for DDR5, depending on age).
Generation: Mixing DDR4 with DDR5 won’t work. The slot physically prevents it.
Capacity: Check the maximum supported RAM. Most modern Mini PCs handle 32GB or 64GB.
Speed: The system will run all sticks at the speed of the slowest one. Matching speeds is ideal.
To make compatibility clearer, here’s a simple breakdown of what to look for based on the Mini PC’s age:
| Mini PC Generation | RAM Type | Typical Speed | Max Capacity (Common) |
|---|---|---|---|
| Older Models (Pre-2020) | DDR3L or DDR4 SODIMM | 1600MHz – 2400MHz | 16GB – 32GB |
| Modern Budget (2020-2023) | DDR4 SODIMM | 2666MHz – 3200MHz | 32GB – 64GB |
| Current Gen (2024+) | DDR5 SODIMM | 4800MHz – 5600MHz | 64GB – 96GB |
Gathering the Tools
The tool requirement is minimal. A small Phillips-head screwdriver is usually all that’s needed. One thing that’s helpful—though not strictly necessary—is a plastic spudger or an old guitar pick. These plastic tools help pop open the bottom panel without leaving scratches on the casing. Metal tools can slip and damage the motherboard, so it’s better to avoid them if possible.
Opening the Chassis and Accessing the Slot
This part varies by manufacturer, but the principle is the same. Most Mini PCs have a bottom panel held in by screws—on a 5500U AMD Mini PC, for instance, the layout is pretty standard, with four screws tucked under the rubber feet. Some have rubber feet hiding screws, which is a small trick that catches people off guard. Peeling the feet back carefully preserves them for reassembly.
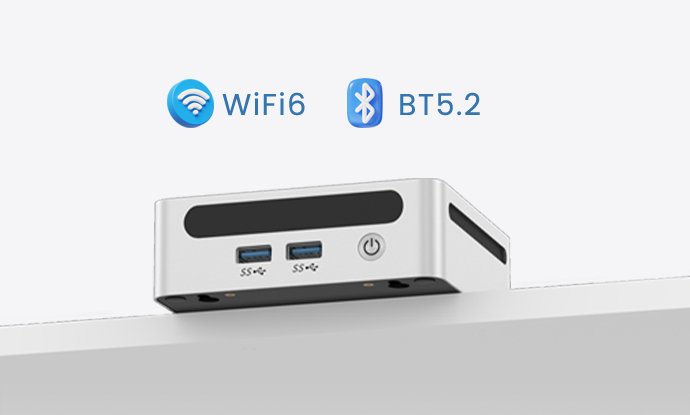
Once the screws are out, the panel usually comes off with a gentle pry. Some cases have a sliding mechanism, but for the majority, it’s a simple lift. Inside, the SODIMM slots are usually located near the center or along one edge—again, on that 5500U model, they’re right next to the Wi-Fi module. If there’s a metal shield covering them, that pops off as well.
Installing the New RAM
The installation process is about angles, not force. The SODIMM stick goes in at a 30 to 45-degree angle. It should slide in smoothly until the gold contacts are no longer visible. Pressing it down flat until the side clips click into place secures it.
There’s a common moment of hesitation here when the clips don’t seem to want to engage. It’s usually because the stick isn’t fully seated in the slot at the initial angle. A quick check to make sure the notch in the gold pins aligns with the key in the slot solves that. Once the clips are locked, the stick should sit perfectly parallel to the motherboard.
Post-Upgrade Checks
Before putting the bottom panel back on, it’s a good idea to do a quick test. Plugging in the power and booting up with the case open lets you know immediately if the memory is recognized. The first boot might take a bit longer than usual—that’s normal. The system is retraining the memory.
If the machine boots to the operating system, the physical installation is done. Power down, reattach the bottom panel, and screw it back into place.
FAQ
Will upgrading the RAM void the Mini PC warranty?
In most regions, simply opening the device and upgrading RAM does not void the warranty, provided no physical damage occurs during the process. However, some manufacturers have specific policies.
How much RAM is enough for a Mini PC used as a daily driver?
From experience, 8GB is the bare minimum for a smooth experience with modern operating systems and light multitasking. For anyone who keeps multiple applications open simultaneously—like a browser with several tabs, a communication app, and office software—16GB is the sweet spot. For content creation, virtualization, or heavy data work, 32GB offers comfortable headroom.
Can I mix different RAM sizes or brands in a Mini PC?
Yes, mixing brands is generally fine as long as the generation (DDR4 vs DDR5) matches. Mixing sizes, such as pairing an 8GB stick with a 16GB stick, will still work. The system will run in a mode called “flex mode,” where the matching capacity runs in dual-channel for better performance, and the remainder runs in single-channel.